Pages

.

Tuesday, August 28, 2012

Chevron Craze

The past week has been a little crazy between grad school orientation, clinic orientation and starting classes I've just about lost it (well, not quite HEY, I've been on the no plan-plan for the past 3 months so cut me so slack will ya?)

Since I haven't too much free time recently I spent last weekend redoing some cute end tables I found earlier this summer on the side of the road for 5$- say whaaaaaattt? Yup, 5$ and they're solid wood and in great shape, heck ya!

I kept them in the garage for the past two months, the legs screw off so they are SUPER easy to store- thank goodness or I think I would have found them down by the garbage (sorry Mom and Dad.) I was wanting to do chevron stripes on the wall in my room but after attempting part of the wall I QUICKLY changed my mind- what a pain in the butt!

So I decided to do the stripes on the top of the table and I think they turned out pretty cute!

NOTE: I tried to make the stripes relatively the same size but it's more difficult than ya would think, regardless I love how they turned out and are for sale so let me know if you're interested!


Once again, forgot the before pic (sorry Charlie)


Tuesday, August 21, 2012

School....?

Grad school orientation is tomorrow... YEAH, tomorrow. Slowly beginning to panic. 

I just had the most wonderful four days in Tampa with Hunter, avoiding the reality of school starting on the 22nd. The 22nd, that's in like another month right? WRONG Marisa, so wrong, that would be tomorrow... Farewell summer, you were a good one. 

I'll post later this week with a new project, I got a few brewin' in this ole noggin of mine. Until then, here's a few pictures from this weekend:

Out at a Battle of the Bands show for Christa's 27th in Ybor

Have I mentioned how freakin' happy I am to be living in the same city as my brother and sister again? Well this photo should explain why.

Christa dancing on Hunter, yup, on him. Hunter unsure of how to react. Bahaha

Out to dinner with Bianca and Chris 

Even though I look like I'm doing the Rock eyebrow, had to do it. I missed Bianca TOO much, so much we decided to dress the same. 

My love. 

Goodness, could he be any more handsome? Good, I agree.

That's the "are you sure you have to go to school ma??" look


Hope ya'll are having a great week, wish me luck... lots of it


xoxo

Maris

Thursday, August 16, 2012

I carry your heart with me

I've been redecorating my room for the past couple weeks now and I really love how it's coming together, but (there's always a but) there was something missing. I'm usually not crazy about hanging things on the wall, I like clean, simple, classic. However, I've been seeing a few cool paintings on pinterest that I've been loving; like this one.

I had two left over canvas's from a painting I did for Hunter a couple years ago- and finally I had a use for them. OH YEAAAHH.

I wasn't sure what I wanted to paint on them, song lyrics, a quote, a poem, so I was sitting at my desk deep in thought (eh, debatable) and I saw this picture of my mom I just put up the other day:


I love this picture of her from her wedding day.


Then the little hamster in my head started goin', I was definitely going to do one of my favorite poems by E.E. Cummings,  "I carry your heart with me (I carry it in my heart)"

I couldn't fit the last stanza but that's okay I still absolutely adore it. Here it is with one coat (well partially):

A few tips I picked up:


  • Prime the canvases with a white acrylic paint/water mix (lightly)
  • Do your first coat of the words VERY lightly, it is insanely easier this way
  • Don't worry if it's not perfect, that's what makes it beautiful (yeah, I'm that corny)
Anyways-

Here's the a few pictures of the final outcome:


Perfectly Imperfect? Just how I like it.

xox
Marisa

Wednesday, August 15, 2012

A Hump Day Treat

Happy Hump Day! 


Last night we had a pretty awesome dinner to celebrate my sister's birthday- and OHHH was it delicious. I could probably make one post everyday for a week for all the different things we ate but I'll keep it nice and simple and just give ya the low down on two simple but tasty appetizers.

I'm slacking a little bit on the picture taking, so bare with me, k? Great.

First SUPER easy side dish/app my mom and I make for just about every occassion-

1. Tomato and Mozzerella: Caprese Salad

Ingredients: 
  • Tomato 
  • Mozzarella 
  • Spring Mix
  • Olive Oil
  • Balsalmic
  • Salt and Pepper 
  • Olives- Optional but delish 
Steps:
  • Slice your tomato (one or two, depending on how much you want to make)
  • Slice fresh mozzarella 
  • Lay down the spring mix on a plate then lay down one tomato slice, and a mozzarella slice on top
  • LIGHTLY drizzle some olive oil and balsamic on top
  • Sprinkle with salt and pepper 
  • If you'd like, top with olives
Enjoy- mmmmm


2. Smoked Salmon Roll-ups

Ingredients:
  • 1 cup whipped cream cheese
  • 1 tbsp fresh chopped chives, plus whole ones for garnish 
  • 1 tbsp chopped parsley
  • 1 dash of extra virgin olive oil 
  • 2 tbsp lemon juice (fresh is always better)
  • Smoked salmon in about 2 inch strips (doesn't really matter so don't get too worried about it)
  • 1 cucumber cut into slices approximately 1/4 inch
Steps:
  • Mix cream cheese with herbs, lemon  juice, salt, pepper and a bit of olive oil to thin it out. 
  • Carefully spread a small amount of the cream cheese mix over each piece of smoked salmon
  • Roll up the salmon pieces
  • Secure salmon pieces with a strand on chive, carefully knotting it
  • Serve on top of cucumber slices and drizzle with olive oil
  • Serve! 
Ingredients

Before rolling up


Enjoy these delicious, cute appetizers!

Appetizer on the left is an Eggplant- Goat Cheese tart (SOOO good) I'll give the recipe for that little number another time, promise!

xox
Marisa


Tuesday, August 14, 2012

Mercury Glass and Birthday Sass

Before I get into a quick DIY on mercury glass, I wanted to start by saying:


Happy Birthday to the sassiest, sweetest, most sarcastic, shrimp-hating, clothes buying, marker loving  sista out there- Christa! Happy 27th girl fran!  Hope you have the most amazing day, can't wait to celebrate tonight and this weekend! 


Love you, mean it.

Now on to some important business- 

DIY MERCURY GLASS

Materials:

  • Clear glass objects you want to use for the project- I found mine around the house
  • An empty spray bottle
  • Water
  • White Vinegar 
  • Silver Metallic Spray Paint
  • Cotton Balls
  • Newspaper 


Steps:

  • Fill spray bottle up with 1 part water, 1 part vinegar- Mix well 
  • Lay down newspaper on work surface
  • Make sure you clean the glass pieces you're going to be using
  • Stuff the insides of the glass with more newspaper (you want to keep them clear inside for best results)
  • MIST your first glass piece then spray a LIGHT layer of silver over it. Let sit for about 1 minute
  • Using a cotton ball- dab away the water mixture droplets
  • Spray with water mixture again, then lightly spray the silver. Let sit for another minute or so and dab away again
  • CONTINUE that step until you get the look you're aiming for

TIPS:

  • Use a new cotton ball every time 
  • Make sure you spray the glass with the water/vinegar mixture BEFORE the spray paint
  • Be patient, it took about 5 layers to get the look I wanted
This is the mason jar beofre wiping off the second layer of spray paint

Four of the finished pieces


First mason jar I did

My Favorite

Whatcha think? Not so bad for a 5$ project...

xox
Maris


Friday, August 10, 2012

Window Pane Makeover

Helllllllloooo Friday! 

I went out yesterday and got a few things to do a new DIY I've never tried- Mercury Glass (like these little numbers) I love the way they look but at 200$ a pop...pssshhhh so not happening. Anyways, it hasn't stopped raining all day so you're just going to have to wait (sorry Charlie.)

A few months back I bought an old window pane from a second hand store for a WHOPPING 5$ (yeah I know, big spender right?) I wasn't sure what I was going to do with it but after a few days of brain storming, and by brain storming I mean lurking around Pinterest I decided to make it a picture holder.


So here we go....

This was after I wiped it down with a damp rag- so much dirt I had to rethink why I got it in the first place, so if yours looks anything like this don't worry it will still work.

After I wiped it down I picked up to of my paints in the garage, an antique white and a light grey. I did one coat of the grey then took a dry brush and put a light coat of the grey on top. I let the dry, then lightly sanded it down so I was able to see the wood underneath, even some of the greenish tint! 

She's looking a little better right?..say yes

Once the sanding was done I took some left over hemp I had from a previous project (you can buy it at any craft store for like 3bucks) and twisted to pieces together the length of the pane. 

Next, I used hot glue (hi-tech, I know) and adhered the hemp to the pane.

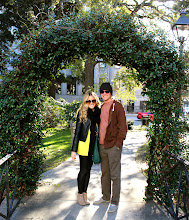
 I found some little clothes pins for about 2$ at the craft store to hold the pictures to the hemp. Now that I'm back home with my parents (pretty great roommates if ya ask me) I went through some of their old albums and found a bunch of old ones of the two of them:

They're pretty freakin' cute, right?


Now for the REAL HARD PART....Clip the pictures to the clothes pin


SO easy, SO cheap, and SO darn cute. 

xox, 

Marisa


Thursday, August 9, 2012

Hutch Re-do

Good morning! Now that I've had my two cups of coffee I'm ready to function as a human and do a quick post about this neat piece.

Final Turnout


I really wish I had a picture of it before, but to put it nicely it was just plain ol' ugly. Solid wood with no finish what so ever. Bright side- this is the original hardware. Down side- still haven't gotten new knobs for the piece (woops!)

Again I used the Annie Sloan Chalk Paint- I love it but it's slowly burning a hole in my FUNemplyoed pocket.

STEPS:
  1. Remove everything from the hutch, and wipe it down- I use lysol wipes. 
  2. Remove the doors and set aside screws and hardware.
  3. Apply your first LIGHT coat to piece, let fully dry- only took about 35 minutes. ( My mom and I used- Old White)
  4. Apply second coat and allow to dry over night.
  5. After my two coats of white were applied, I went ahead and applied Annie Sloan's, RED paint inside the glass part of the piece. Again I allowed that to dry over night. 
  6. The next day I lightly sanded the edges and any crevices of the piece.
  7. My mom and I applied the Annie Sloan CLEAR wax to the piece, allowed it to dry 24 hours and then put the doors back on.
My mom got a little crazy with the sanding...easy to do and easy to fix. I just went over the spots that I thought were TOO distressed with a little more paint- Problem solved! 

Since the hutch didn't have a previous paint of seal on it, it DEFINITELY absorbed more paint- YAY!

Oh well, overall the hutch turned out AMAZING and my mom couldn't be happier to have it displayed in the kitchen. 


What do ya think??

Hope ya like it as much as this little lady and I do!

xox Marisa


Wednesday, August 8, 2012

Did somebody say Man Flowers?

DIY: MAN FLOWERS


My dad's birthday was in June and I had NO idea what to get him. I had seen an idea similar to this on pinterest months before but I completely forgot about it (ooops). Of course until I saw Hunter's sister make one for their dad for Father's Day, and I'd be lying if I didn't say it was CAAAA-UUUUTEE! 


My version of Man Flowers

What you need:

  • Flower pot 
  • Moss
  • Ribbon or straw (for the bow/optional)
  • 9 small dowels
  • Floral Styrofoam 
  • Floral Tape
  • Floral Leaves (optional)
  • 9 Mini bottles of their favorite liquors
  • Hot Glue Gun

Steps:
  1. Tightly wrap the dowels with floral tape. It will stick to itself and is easy to use.
  2. Insert individual leaves onto dowels, adhere with more floral tape.
  3. Hot glue one liquor bottle to dowel, hold for about 40 seconds or until glue is dry. 
  4. Insert styrofoam into flower pot. 
  5. Push dowels with liquor bottles into the styrofoam, top off with more hot glue to secure. 
  6. After all 9 dowels are inserted and secure into the styrofoam drizzle with hot glue and place moss on top!
  7. Finish your man flowers off with a ribbon or in my case, a straw bow! 
BAM! You got yourself a pretty fabulous bouquet any man (or woman hah) would love!


Drink up and enjoy! 


xox, Marisa 


I'm back, back again

WOW. It's been awhile and too much has happened to play catch up on it all but I'll just give a quick run down before I start posting about the REAL JUICY stuff- my summer DIY projects.

First off, I graduated! Thank you Florida State for the BEST four years I could have ever imagined.


Secondly- I moved back home just three weeks before my brother and sister-in-law moved back FOR GOOD (Insert sappy comment here) My family, my sister-in-law's family and Hunter spent a week at Palm Island together- holy relaxation...and mosquito bites. 

Palm Island


Sista Sista

Seeing this was worth the mosquito attack

Even the Tuck man got to come- Pups first trip to the beach= SUCCESS 

My brotha

Third- Spent two AAAAMAZING weeks with family in New Jersey and a weekend with my sister in NYC. 
Lake Kampfe in NJ

Got to celebrate my grandparent's 59th wedding anniversary- TOO sweet

Christa and I at Beauty and Essex in NYC

Finally- The rest of my summer has been consumed by driving back and forth to Tallahassee to see the beau, fishing with my dad, catching up with friends and DIY projects ( that'll be my next post don't cha worry!) 

This handsome fella I picked up 

Sunrise fishing

Perfect

Lexa, who is going on her mission trip to BRAZIL! Couldn't be more proud of ya girl xox

Two of the best friends I could ask for 

Alright, I'll spare ya the rest. For now I'm learning home isn't a place but a state of mind. That's all  folks! 

- Maris